Showing posts with label diy. Show all posts

Thursday, September 18, 2014

DIY Halloween Mantle 2014

DIY Halloween Mantle

I'm back on the blog! So excited to show you my Halloween mantle! I seriously love Halloween!!! I mean what other Holiday lets you put skulls and scary stuff out on display and no one questions your mental state? For the past five years, I have been decorating for the holiday, but just this year, I added a few more diy projects that I wanted to show off. 


I used my Teresa Collins Cut 'n' Boss, to create some simple projects  fast & easy!


First, here is the mantle display!


I went with a witch theme this time around, last year was more of a color (orange, white, and black) and a ton of birds a la Albert Hitchcock, but then one day as I was getting in my car, a ton of black birds sort of attacked my car, so I got scared and decided that I didn't like ravens that much, so I toned it down this year. I realize there are some stuff in need of balance on the mantle, but nothing is perfect in life now is it?Kind of love the not so "perfect look".

Anyway, on to projects:

My '31' frame is a dollar buy, and I just popped off the glass and embossed one piece of cardstock on the Teresa Collins Cut 'n' Boss using her 'About Time' folder and added chipboard stickers to decorate the rest. 

Took me 5 min!


My 'Wicked' Banner was made using the Cut n Boss with a couple of old dies. I just cut out the triangles (I used my eCraft for that) and then used a doily round die and some coordinating card-stock to put it together. For dimension, I added the emboss on the doily and flag banner. There doilies behind the round die cut, are from Michaels. 

Simple project ^ just a dollar store tiny frame with purple card-stock and a 3D sticker.

Now, no witch mantle is complete without spell books! I bought paper mache blank books at Michaels and used modge podge, paint and stickers to embellish!


Super simple! Just paint the books with some acrylic paint, let dry, and decorate! I modge podged the front with scrapbook paper, and added stickers to add more oomph!

These are the paints and stickers I used for anyone wanting to know. :)


 This is the inside* I plan on adding some spiders or candy, but will wait until we are closer to Halloween!

I hope you liked these projects!


Let me know what you think!


Jazmin

Saturday, July 19, 2014

Nautical Baby Shower

Boy On Board!

Sorry, I have been MIA from the blog, but it's Summer and the kiddos and I are soaking up the sun before they go back to school! This summer has been awesome! Matthew is 10 & Olivia is 7, and its perfect. 

They are just so easy going and fun! it's weird that I have kids this age, because it seems all my friends are just barely starting their family. I was a youngster mom, and I kind of like it, but I also missed out on the whole Pinterest baby showers! ;)

My dear friend Yessi is pregnant with her second, and it's a boy! (she has a big girl at home!) Isn't she the prettiest pregnant lady?!?! 

This is Yessi ^

She's from the coast of Mexico, and loves all things Nautical, so I teamed up with another friend and threw her a Nautical baby shower for her baby boy!

I made this cute little watercolor banner for her and sort of used the colors as the inspiration!

We did Navy Blue, Baby Blues & Green mint with White and a tiny bit of gold. 

My partner host Nikki Maxon did the food, and it looked gorgeous! Check out the spread!


Sugar cookies as sand dollars?! Come on! It's Pin worthy!^ I'm sure it's been done, but did they taste as good? Probably not! Nikki is a whiz in the kitchen!

"Crab cakes" where just chicken salad cakes in the shape of a crab! 


Love how it all went together! And with baby Steven's dropping in 3 weeks it was just in time! 

Jazmin 

XOXO

Thursday, June 26, 2014

Airbrushed Coffee Filter '4th of July' Wreath

Airbrushed Coffee Filter '4th of July' Wreath

RED, WHITE, & BLUE! 

Is everyone else super excited about the USA in the World Cup?! My husband seriously is on cloud 9! Here are casa de Gibbons, we enjoy soccer. And lately, the patriotism has become quite strong! To celebrate, and replace my sad Easter wreath, I decided to create something for the 4th of July using my eBrush!

 Plus my door was basically begging for the change. It still had the Easter Egg wreath hanging and the little eggs had gone from bright and colorful, to white from the being sun bleached

Yeah... 

So, I went into my craft room and I found a wreath form in white styrofoam that I had bought months ago.. (i have a habit of buying on sale, and with no real project in mind..:/)

I went to the store and bought some white coffee filters & toothpicks, and decided i would do a coffee filter wreath like this one.

But, I was going to add a little twist by adding color with my eBrush! 

This is how it turned out:
Fun huh?

Here is how I did it: 

           Step 1: Place coffee filters on wreath form. I just used two coffee filters at a time, folded them in half, and then once more until it looked like a flower. I used two toothpicks to pin down on the wreath. Not gonna lie, it took a long time! So, I suggest buying a wooden wreath form and hot glue the coffee filters!


Step 2: Used my eBrush and Spectrum Noir Markers (Red & Blue) they came in the HSN bundle! I simply sprayed the wreath in the inner part of the wreath in blue and then used read on the outside.  You need a few coats of color to really get the vibrant look, but it takes no time at all! Just go over it a few times.  The great thing is that you can't mess this project up! You just keep airbrushing until the color is they way you like!


Step 3: Using my digital die cutter, I cut out the word: 4th of July and some stars with glitter chipboard, and hot glued on the front of the wreath.


Here it is outside where it was more sunny! ^

The result is this really fun, festive look! Your guests will be ready to party the moment they come to your door! 

GO USA!

I hope you enjoyed this project!


Jazmin

Friday, June 13, 2014

Come Hop Along!

Xyron and Craftwell's Summer Blog Hop! 

I have been invited to join the Xyron/ Craftwell Blog Hop next week! 

Come join in on the fun!


Check out the rules and restrictions on Craftwell's Blog!

Jazmin Xxoxo


Monday, June 9, 2014

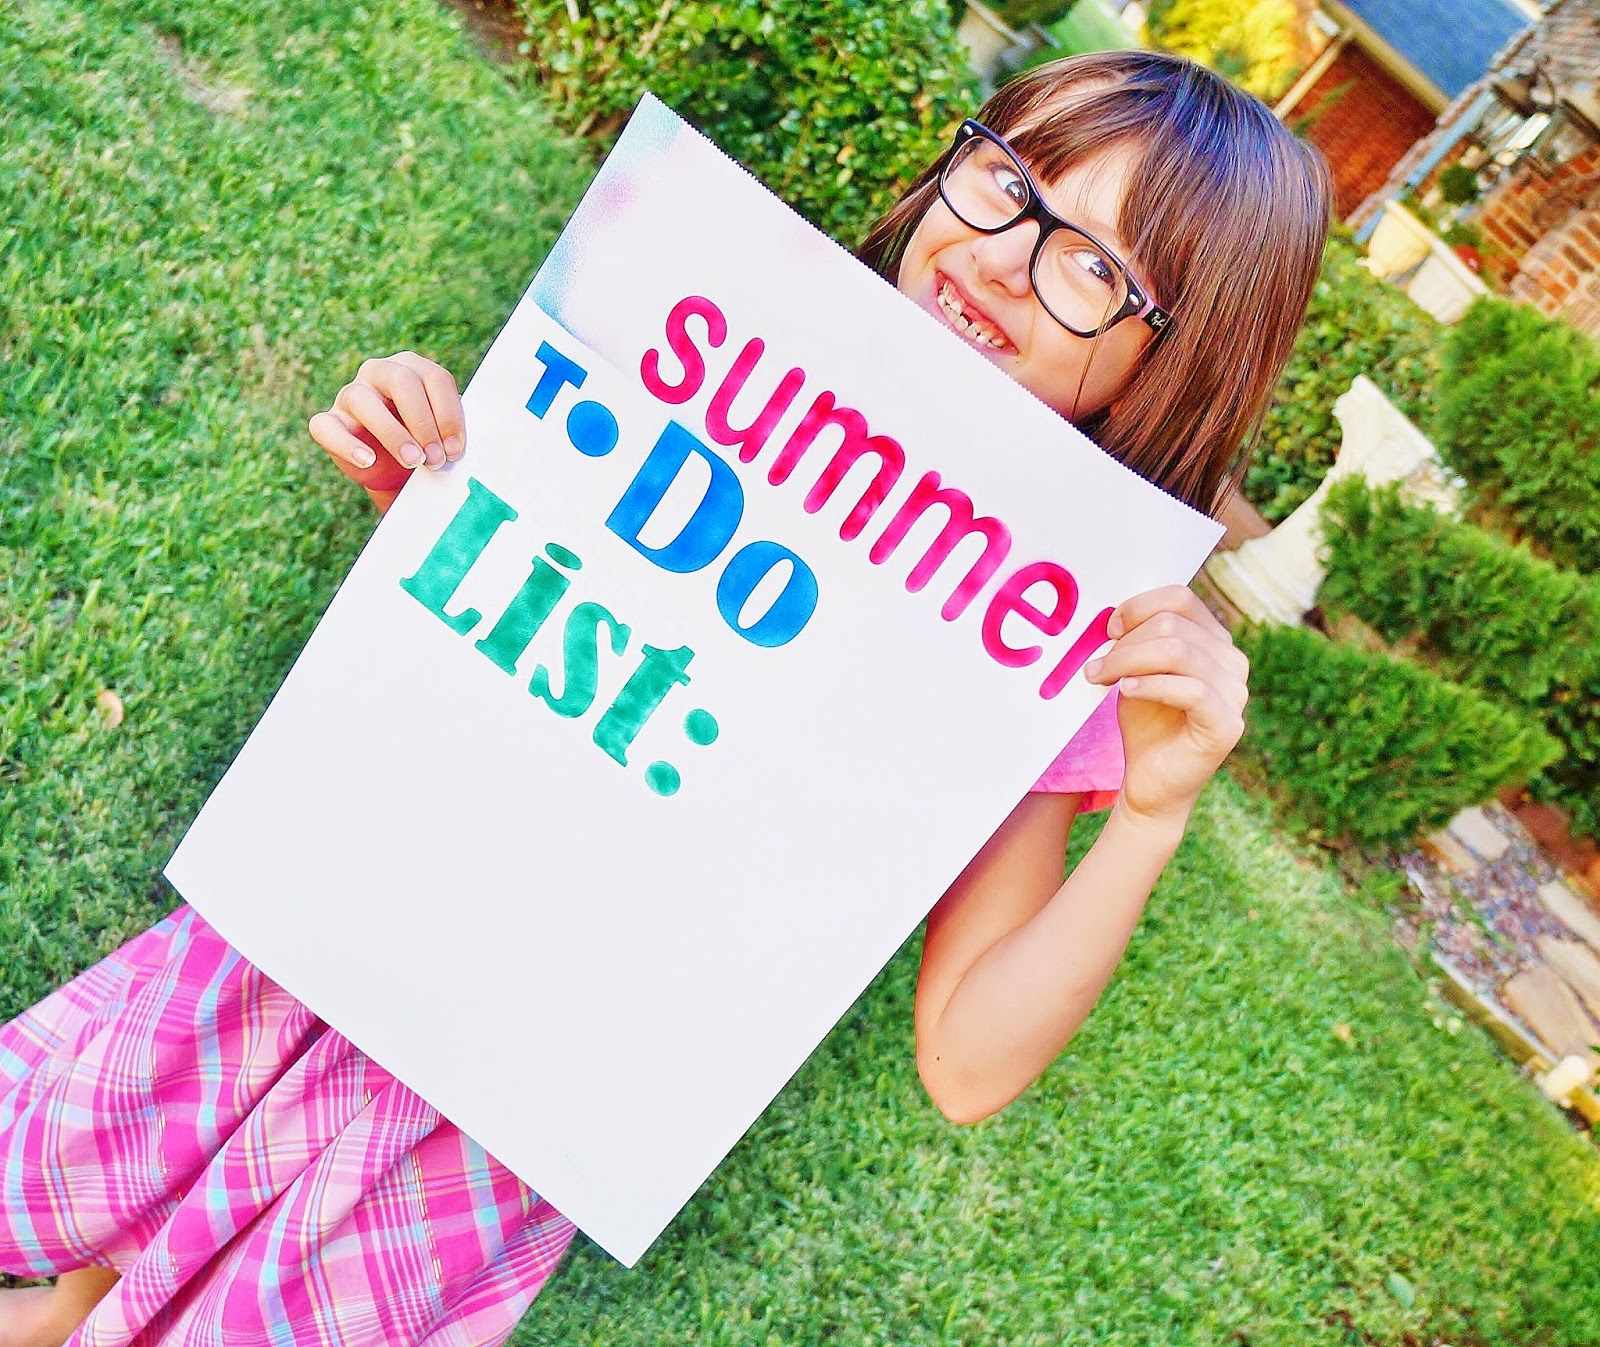
Airbrushed 'To-Do' List/Summer Fun with the eBrush by Craftwell!

Airbrushed 'To-Do' List

It's Summer! And my plan is to post more kids crafty projects over the next few months! I love that my kids are out of school! And I'm really wanting to plan activities for the next few months, because I don't want the kids planted in front of the tv 24/7... SO, kid projects it is to keep their minds busy! 

And speaking of kid projects, I have to tell you about my new favorite toy...

Introducing the eBrush by Craftwell! This nifty little tool will have you airbrushing anything and everything in sight! 

So, the eBrush is an air compressor that turns markers into airbrush paint. It's sooooooo fun, and simple! So, simple, my 7 year old daughter Olivia is turning into a total pro! Great for kid art time! -And equally great for mommy craft time! Seriously, I have sooo many projects in mind! Stay tuned!

So, every summer it seems that we end up in a rut. We sort of love swimming, and watching movies, and that's fun an all, but the kids really do need more stimulation. So this summer, I decided to have the kids write down things they want to accomplish during the next few months. This way, if we ever don't know what to do, we can reference our 'Summer To-Do List' and check off something we haven't done.

Well, today was their first official day of summer (the weekend didn't count) and what do you know? it was cloudy and rainy!...... FUN!!!!!!!!!!

Yeah, a 10 & 7 year old with energy to power a city, and the day was not cooperating! 

Panicked,  I went into my craft room and introduced the kids to the eBrush!

We decided to create a poster with our to do list, and we used the eBrush to decorate the paper!

Olivia is my little mini-me and decided she wanted to tackle the project. Matthew was busy writing down ideas of what to do, so that was helpful. We divided and conquered! 


MATERIALS USED: 

+eBrush by Craftwell w/ Spectrum Noir Markers (all three are included in the HSN bundle!)
+Poster paper
+Cardstock (for our word templates)
+Digital die cutter to cut out the words: 'Summer','To-Do', and 'list' 
+Elmers Spray Adhesive


We used cardstock to cut out the words and sprayed the back with a little bit of elmers spray adhesive so that the template would not move. 

Olivia popped one of the markers into the eBrush and started to airbrush on the templates! So easy!


When she was done, she just gently pulled the cardstock template off the page to reveal the words!


She did the same process for the rest of the poster, and voila! 

DONE! 

Now, we are about to write things down on our list and hang it in the living room! 

We will have a guide to make this summer the best summer ever!!!!


Want an eBrush? Then tune in June 11th on HSN for it! The bundle includes the markers, the machine, and several adapter tips for most popular brand of markers! 

Happy Summer!

Jazmin

Monday, May 5, 2014

Feliz Cinco de Mayo!

Cinco de Mayo Card

I'm back! Ok, so I'm still deciding whether or not to keep up with this blog. Im in the process of just condensing my family blog with this blog! So, if I end up going that route, I will update all the info here!

In the meantime, here is a little card I made today in honor of Cinco de Mayo! 

I get to post some of my creations on the Craftwell Instagram account, so that makes me happy!

Here is what I used: 

Core'dinations white and yellow cardstock
Teresa Collins 'Dotted Chevron' embossing folder
Avery Elle's stamps & dies (Papel Picado) perfect for Fiestas!
paper doily
Maggie Holmes 'Styleboard' collection chipboard piece (horse) and (5 cents tag)
Fancy Pants Designs sticker (top corner flag) 'happy go lucky collection'


It was really fun to make! I loved making something different that what I normally do! 

I hope you liked this project! 

Jazmin

Monday, April 14, 2014

Birthday Gift Wrap Idea!

It's a Wrap!

Last week was my mother's bday. I had to do something special for her! That special thing I did was wrap some DoTerra Essential Oils in a cute little package for her!

A few weeks ago, I hosted a DoTerra demo and my mom really wanted to purchase some oils. BUT the oils are not cheap. Still, wanting to give her some, I bought the sample pack trip for $25 dls and wrap them pretty to present to her. 

She liked the box, and she liked her gift more! 

I used brown paper, lace, doilies, cutouts and stickers for this wrap job.


I hope you like!

Jazmin 

Tuesday, March 25, 2014

Summer Layout

'Summer'

Hello! I'm a guest designer over at the Craftwell Blog today! Be sure to check out the material list for this layout on their blog!

Here are some snapshots of my project!


Thank you for visiting!

Jazmin

Thursday, February 13, 2014

You've Captured My Heart: Polaroid Valentines!

Polaroid Valentines Cards!


Happy Valentines! I seriously, stayed up WAY too late yesterday, finishing up my kids Valentines cards. Every year it seems like I have one idea or the other, which is fun, but sometimes it's just fun to not do much and enjoy the holidays. 

Well, my son is all for easy! He wanted to just buy his Valentines, and I was sooo happy he did! Last year we made his, and it took forever!!!!!!!!!!! But he's in 4th grade, and he is starting to just not care about this holiday too much. If only this will last until the end of High School!Uh, huh.. I can dream.

 Well, having dodged bullet on the DIY Valentines for Matthew, I thought I could talk Olivia into the same, but NOPE. She still wanted to make them, and by her making them, it meant me helping her.... a lot! And she's ambitious too! 

So, we sat down and thought about what we wanted to do. She loves my INSTAX camera and I had already used it as part of my inspiration for my 'polaroid Valentines banner' So, I suggested doing something that pertained to taking pictures. We brainstormed and we decided on making a cardboard camera, and cutting out her valentines cards like a 'Polaroid' picture. You see, polaroids are such old technology, but to these digi kids, it's magical! Olivia can't believe she gets to take a picture with my instax and get a picture in minutes! 

Anyway, I knew I could find something around the house to do it. and yes, I found stuff in the recycling bin!


I got a long piece of white cardboard and some round cardbord thing, that came inside a shipment of glasses from World Market. It made the PERFECT lense!


All I did was fold the cardboard into a triangle, and hot glued it to hold it together.


 I used Teresa Collins 'You are My Happy' collection to decorate the cardboard camera. I used an exacto knife to cut out a hole, to look through, and a long slit where the Polaroid cards can be pulled out.


Not perfect, but it works!


I loaded her 'camera' with cutouts of polaroids that I printed sayings of pictures related things, like 'Instant friends' and 'Oh, Snap! You're Awesome' and of course, 'You're picture perfect, Valentine!'


So, now Olivia has a Valentine's box/ Camera with instant Valentine cards! She loves it! ^^^

It turned out really cute, and was worth the effort! 

So, did you make your Valentines from scratch? or are you smart and use store bought? 

I want to know what other mama's out there are doing!

Jazmin
xoxo

Monday, January 27, 2014

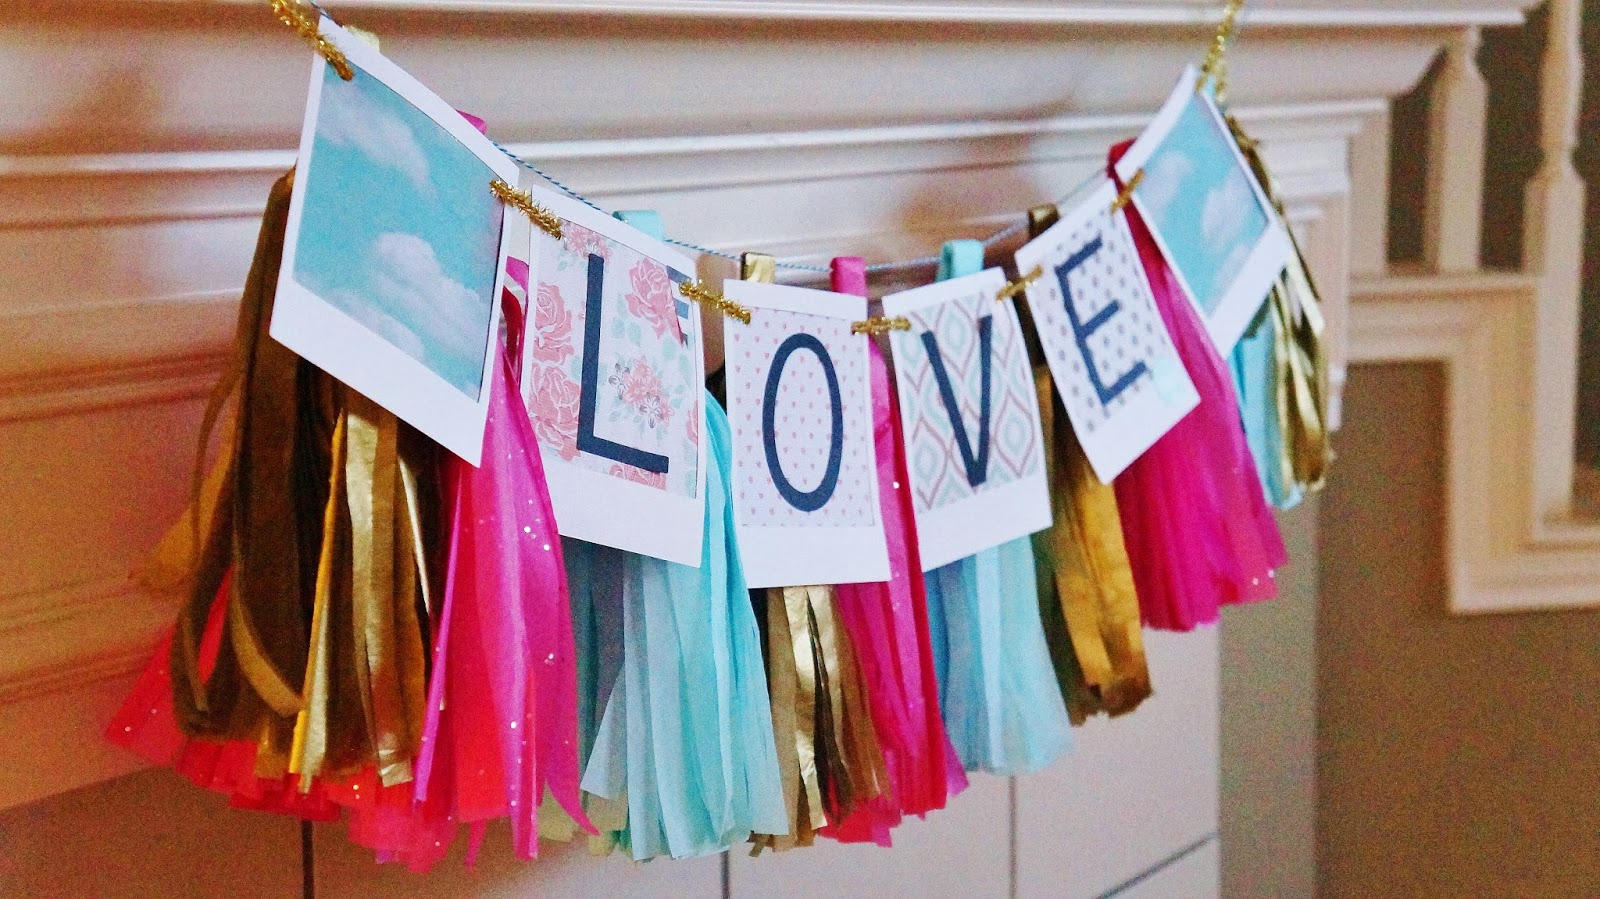
All You Need is LOVE

Tassel Garland

I updated my LOVE polaroid garland with the ever popular tassel garland! Well, i layered them and I love the festive feel! 

Are you into the tassel garland trend?


I will post a tutorial on how to do this the lazy way! I seriously, love finding way to skip steps! 

Hopefully I will have it up by the end of the week! 

Jazmin

Wednesday, January 22, 2014

SHAKE IT, LIKE A POLAROID PICTURE!

Polaroid Banner

I'm back with another easy project! I normally decorate for all Holidays, and Halloween is usually my favorite Holiday to decorate for, so today, I bring you my Valentines's decor!

 This year, I'm going low key with Valentines. I usually do way more, but with my husband traveling for work interviews, and my daughters birthday happening a day after my sister's sweet sixteen birthday, it really has all just stressed me out a bit more than usual.

If you follow my Instagram, you know I'm obsessed with the filters and tend to decorate my pictures. So, while I was at this year's CHA show, I got inspired by Teresa Collins Polaroid picture banner, and decided to do something similar, but with paper and letters.


I used my eCraft to cut out the polaroid frames (you can use your own die cutter, like the sillouhette) I cut them to be 5 inches tall, and simply cut out some Teresa Collins' paper, and positioned on the back of the 'polaroid' frame. I used the Teresa Collins' 'Save the Date' collection, and the clouds are from a Maggie Holmes paper pack for crate paper. I like how the clouds add to the picture effect! And the flowers, mixed with hearts and polka-dots from the TC collection, tie it all together and add a fresh, spring feel to it!

The text for the banner was cut with black cardstock on my eCraft as well. And holding it all together, is my trusty, Xyron mega runner glue! Lastly, I simply punched out two holes at the top of the cards, and used some gold twine, to hang it. 


Just to add a little something on top of the mantle, I pulled out my pink lovebird, and used some more of TC's paper to put behind glass in one of my frames. To contrast it, I used one of Teresa Collins' wooden pieces with the word 'always' to accentuate the whole display. 

I hope you liked my banner! This is simple but one of my favorites! 

Jazmin